
Editing Product Photos to Drive Sales

So, you've taken your product shots. Now what? This is where the real magic happens. Editing is that crucial step where you take a basic, raw image and turn it into a professional, polished visual that actually sells. It’s about much more than just a quick filter; we’re talking about removing backgrounds, correcting colors, and enhancing every last detail to make your products pop off the screen.
Why High-Quality Photo Editing Is Non-Negotiable

Let's get straight to the point: great photos sell more. But the real power of top-notch photo editing is a bit more subtle. It’s about building subconscious trust with a customer, guiding them from just browsing to hitting that "buy now" button.
Think about it. Clean, professionally edited images signal quality and legitimacy long before someone reads your product description. This polish can make your brand feel more established, justifying a higher price point and setting you apart from competitors who might be cutting corners on their visuals.
Connecting Edits to Business Growth
The line between sharp editing and a healthy bottom line is surprisingly direct. When you nail the color correction and lighting to accurately represent your products, you're setting clear expectations for your customers. This has a massive ripple effect on your business.
- Fewer Returns: When the product that arrives looks exactly like the one online, you sidestep one of the biggest reasons for returns. No one wants to order a firetruck-red handbag and get something that looks maroon.
- Higher Conversion Rates: Crisp details and vibrant, true-to-life colors give shoppers the confidence they need to make a purchase, which means more add-to-carts for you.
- A Stronger Brand: Consistency is king. When all your product images have the same professional, cohesive look, you build a brand identity that people recognize and trust.
Here's the best part: you don't need a high-end photography studio to get these results anymore. Modern tools and AI-powered platforms like ProdShot put professional-level retouching power right at your fingertips, making it accessible for any seller.
The Growing Demand for Polished Visuals
This isn't just a fleeting trend; it's a fundamental change in e-commerce. The global photography services market was valued at an impressive USD 55.6 billion in 2023 and is expected to climb to USD 81.83 billion by 2032. A huge chunk of that growth is coming from the demand for commercial photo retouching, because in the world of online shopping, your images are your storefront. To see just how much this space is evolving, you can dig into more photography industry statistics.
At the end of the day, spending time editing your product photos isn't a chore—it's a direct investment in your brand's credibility and, ultimately, your profitability.
Setting Up Your Editing Workflow for Success
 Great editing doesn't just happen inside your software. It actually starts with smart preparation. A well-thought-out workflow is what separates a frustrating, all-day editing session from a smooth, efficient one. Think of this prep work as the secret to turning a mountain of raw images into polished, professional assets without pulling your hair out.
The very first thing you need to do is cull your photos. After any shoot, you're going to have way more images than you need—dozens, maybe hundreds. It’s tempting to try and save every shot, but don't. Do a quick, ruthless pass and get rid of anything that's obviously out of focus, poorly composed, or has bad shadows.
Your aim here is to whittle down your selection to only the sharpest, most promising shots. This one step will save you a massive amount of time and ensures you’re only pouring your energy into images that have a real chance of looking fantastic.
Choose Your File Format Wisely
Okay, let's talk file types. The choice you make between shooting in RAW or JPEG format will dramatically affect your editing flexibility. I like to think of it like cooking: a JPEG is a pre-made meal, while a RAW file is a pantry stocked with fresh ingredients.
- JPEG Files: These are compressed right in the camera. They’re smaller and ready to go, but they box you in when it comes to editing. Try to brighten a dark JPEG too much, and you’ll start seeing nasty digital noise and weird color shifts almost immediately.
- RAW Files: These are the big, uncompressed files that contain all the original data from your camera's sensor. They give you total control over things like white balance, exposure, and color after the fact. You can pull details out of shadows and highlights in a way that’s simply not possible with a JPEG.
For product photography, I can't stress this enough: always shoot in RAW if you can. The extra room you get for editing is non-negotiable for getting the perfect color accuracy and pure white backgrounds that e-commerce demands.
Create a Scalable File System
A simple, logical folder structure is your best friend. Seriously. Without it, finding that one specific image you need a few months from now turns into a digital scavenger hunt. A messy system isn't just an annoyance; it’s a time-suck that costs you money.
Start with a main folder, maybe named "Product_Photos_2024," and then create subfolders for each individual product. Inside those, create two more folders:
- RAW_Originals: This is where you dump every single original RAW file straight from your camera. This folder is your vault—never edit these files directly.
- Final_Edits: This is where your finished, web-ready JPEGs or PNGs go after you’ve worked your magic.
This basic setup keeps your source files safe and your final assets easy to find when it’s time to upload. As your business grows, you might want to look into a more formal digital asset management workflow to keep everything running smoothly. It’s a system that will scale with you and save you a lot of headaches later on.
Nailing the Perfect Cutout: How to Remove Backgrounds Like a Pro
A clean, consistent background is the secret weapon of great e-commerce photography. It’s what makes your products pop on marketplaces like Amazon and gives your own website that polished, professional vibe. After you’ve made your basic adjustments, the next crucial step is mastering the cutout—the art of removing the background.
The right technique really comes down to your product and your priorities. You're always making a choice between meticulous, hands-on control and game-changing speed.
Manual Precision vs. AI Speed
So, when should you roll up your sleeves and do it by hand? For products with really tricky details—think fuzzy sweaters, intricate jewelry, or anything transparent like glassware—nothing gives you more control than the Pen Tool in a program like Adobe Photoshop. It lets you trace every single curve and edge with absolute precision, making sure you don't accidentally chop off an important detail. It takes time, no doubt, but for those high-value or complex items, the quality is worth it.
But what if you're dealing with hundreds of photos of something simple, like coffee mugs or books? This is where AI-powered tools are a lifesaver. Tools like remove.bg or the background removers built right into e-commerce platforms can isolate your product and zap the background in seconds. For sellers who need to get products live fast, using AI for this is a huge win. If you're on Shopify, we've put together a handy guide on how to remove the background from your Shopify images to make this process as smooth as possible.
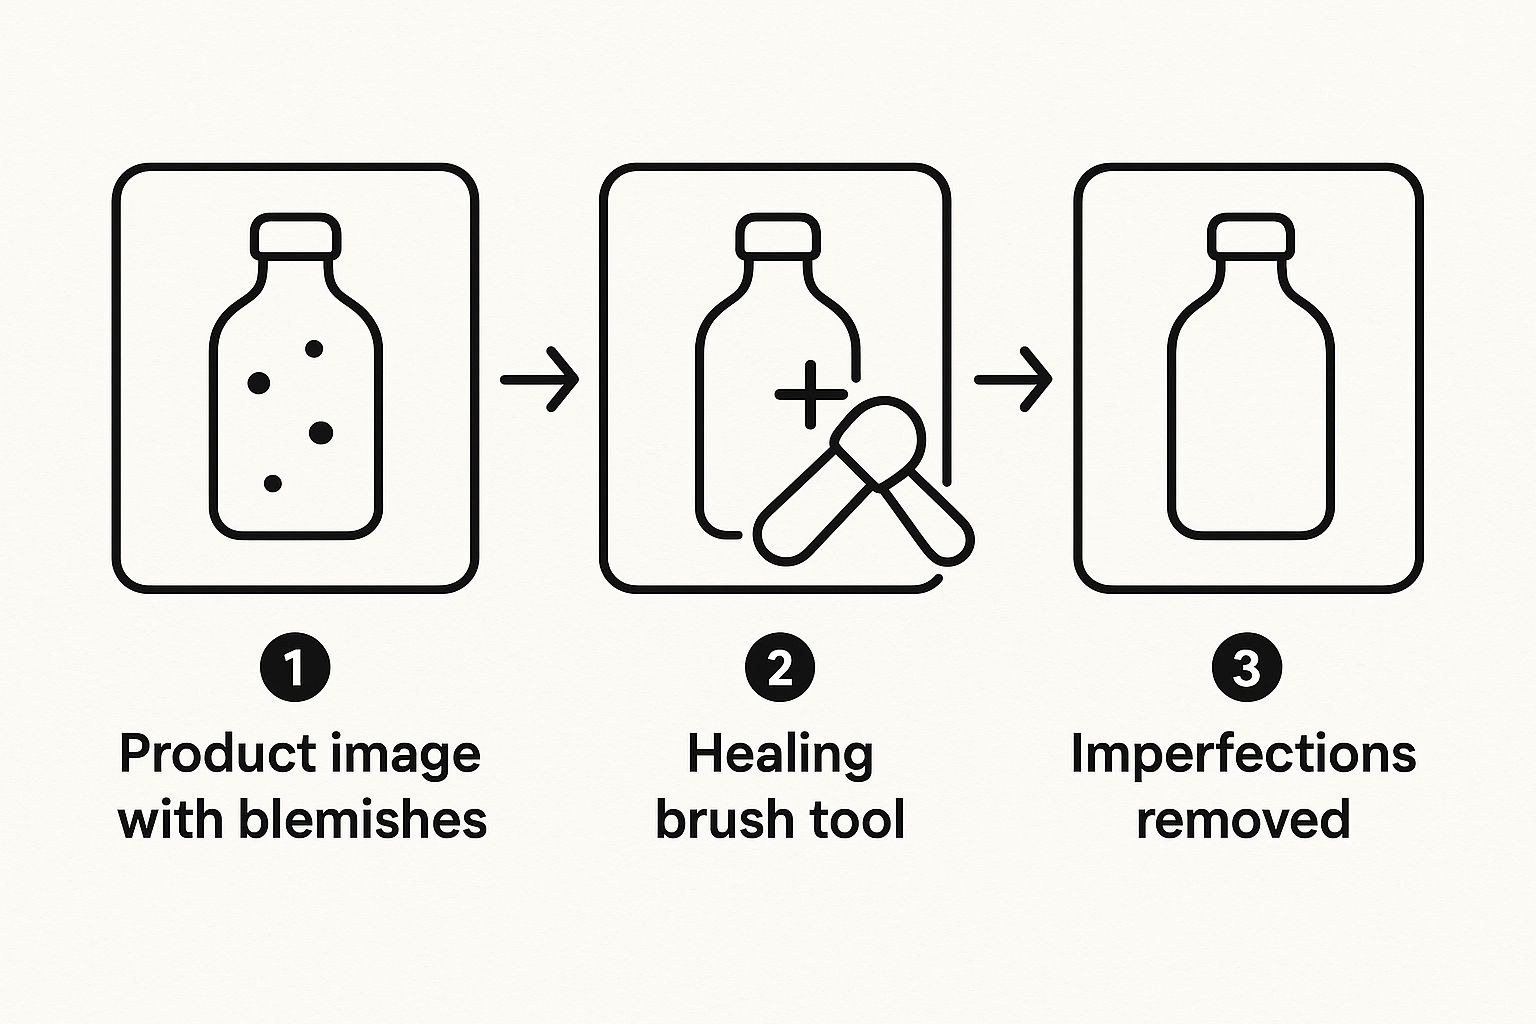
As you can see, the editing process is all about refining those little details. Getting rid of tiny imperfections is what separates a good shot from a great one.
Choosing between manual and AI methods involves a trade-off. Here’s a quick breakdown to help you decide which path is right for your workflow.
Background Removal Method Comparison
| Method | Best For | Speed | Precision Control | Learning Curve |
| Manual (e.g., Pen Tool) | Complex shapes, fine details (hair, fur), transparent objects, high-value products. | Slow | High | Steep |
| AI-Powered (e.g., ProdShot) | Simple, well-defined shapes, high-volume batches, quick turnarounds. | Very Fast | Medium | Low |
Ultimately, many pros use a hybrid approach—AI for the bulk of the work, followed by a quick manual touch-up for any tricky spots.
What Makes a Good Cutout? (And How to Spot a Bad One)
Not all background removals are created equal. In fact, a bad cutout can look even more distracting than the original cluttered background. Once you know what to look for, you can’t unsee it.
Here are the tell-tale signs of a poor editing job:
- Choppy Edges: Look closely at the product's outline. If you see jagged, pixelated lines, it’s a sign that an automated tool struggled with the edges.
- The "Halo" Effect: This is that faint, light-colored glow left around the product from the old background. It’s a dead giveaway of a rushed job.
- Missing Details: Did the fine bristles of a makeup brush or the delicate threads of a scarf disappear? An overzealous tool can easily erase these important details.
A great cutout should be invisible. The goal is for the product to look so natural on its new background that a customer would never even guess it was edited.
The demand for these editing skills is growing fast. The photo editing software market was valued at around $2.37 billion in 2023 and is expected to hit $3.29 billion by 2032. This growth is fueled by AI making sophisticated edits more accessible to everyone.
At the end of the day, picking your method is a balancing act between your product’s complexity, how many photos you need to edit, and your deadlines.
Perfecting Color and Lighting for True Realism
Once you've neatly cut your product out from its background, the real magic begins. This is the part where you take a clean but sterile image and breathe life into it, transforming it into a vibrant, realistic photo that builds customer trust. Getting the color and lighting right isn't just about making a picture look pretty; it's about achieving true-to-life accuracy.
Think about it: incorrect color is one of the biggest reasons for customer returns. If that blue sweater they fell in love with online arrives looking more like teal, you've just created a frustrating experience. Proper color correction is your best defense against this common—and completely preventable—problem. The goal is simple: make the product on the screen look exactly like the product that arrives in the box.
Correcting White Balance for Accurate Hues
The first and most important stop is white balance. While our eyes are amazing at seeing white as truly white under almost any light, cameras aren't nearly as smart. A photo taken indoors under tungsten bulbs can look yellow, while a shot from an overcast day might have a cold, blue cast.
Fixing this is usually quite simple. Jump into your favorite editing software and find the "white balance" or "temperature" settings. The easiest trick is to grab the eyedropper tool, which is almost always part of the white balance controls, and click on an area of your photo that should be a neutral white or gray. Your background is perfect for this. This one click tells the software, "This is true white," and it instantly recalibrates all the other colors in the image to match.
Getting this right not only ensures your crisp white backgrounds are actually pure white—not dingy gray or icy blue—but it also snaps your product's colors into perfect alignment.
Mastering Exposure and Contrast
With the color temperature locked in, it's time to adjust the overall brightness and depth. This is a delicate dance between a few key settings.
- Exposure: This controls the overall brightness. You want to nudge it up just enough to make your product stand out and brighten your background, but be careful. Pushing it too far will "blow out" the highlights, which essentially erases all the fine details in the brightest parts of your image.
- Contrast: This is simply the difference between the light and dark parts of your photo. A little boost in contrast can make your product pop, giving it more definition and preventing it from looking flat or washed out.
- Highlights and Shadows: These sliders offer much more precise control. Is a shiny reflection on your product a bit too distracting? Pull down the highlights. Is an important feature getting lost in a dark corner? Gently lift the shadows to bring it back into view.
My personal rule is to always edit for accuracy, not just for drama. The aim isn't to create a moody, artistic shot but to show the product clearly and honestly. A customer should never feel surprised by what they pull out of the package.
When it comes to editing product photos, less is almost always more. The best edits are the ones nobody even notices.
Applying the Final Polish with Sharpening
The last touch is a bit of sharpening. This is what enhances the fine details and textures of your product, giving it that crisp, professional look. Sharpening is what makes the weave of a fabric, the grain on a wooden surface, or the delicate etching on a piece of jewelry truly stand out.
But be careful here—it's easy to overdo it. Too much sharpening creates a gritty, unnatural look with distracting halos around the edges. Just apply enough to make the details pop without looking fake. Most modern editing programs have a masking feature that lets you apply sharpening only to the edges and textures, leaving smooth surfaces untouched. This is the ideal way to do it for products, as it keeps your background clean while making your product’s best features tack-sharp.
Let's talk about where AI really starts to shine: creating entire scenes for your products. We've moved way past simple touch-ups. With the latest AI tools, you can drop your product into literally any environment you can think of. This means you can create stunning lifestyle shots without the time, cost, and logistical headaches of a real photoshoot. Frankly, it's a huge competitive edge.
Picture this: you sell a beautifully designed water bottle. In the old days, you'd have to book separate photoshoots to show it in a gym, on a mountain trail, and on a sleek office desk. That's a ton of work. Now, you can take one clean product photo, and an AI tool can whip up all three scenes—and a hundred more if you want. Suddenly, you have a massive library of marketing images ready for social media, ads, or even A/B testing different vibes. It completely opens up creative avenues that used to be impossible for smaller brands.
Creating a World of Backgrounds from Scratch
The real magic of AI here is its ability to build context. You can feed your isolated product image into a tool like Midjourney or Photoroom and then just tell it what you want. Think "minimalist kitchen counter with soft morning light" or "rustic wooden table next to a steaming mug of coffee." The AI generates it for you.
This is also fantastic for creating simple, clean backgrounds for product listings. Instead of manually creating a dozen different colored backdrops to see which one performs best, you can have the AI generate tons of color and texture variations in minutes. If you're looking to scale up your visual content, an AI product photo generator can be a game-changer for your workflow.
The big idea here is that AI doesn't just automate boring tasks; it opens up entirely new strategies. When you can create endless visual content from a single photo, you can test more, post more often, and speak directly to different types of customers.
The AI Boom in Photo Editing
The explosive growth of these tools tells a bigger story. The photo editing software market in North America alone has seen a massive jump, growing from USD 266.48 million in 2021 to an estimated USD 377.44 million in 2024. What’s driving this? The relentless demand for professional-looking images on social media, combined with AI making high-end editing accessible to everyone. You can dig deeper into how the photo editing software market is evolving to see the full picture.
Once you get the hang of this, you can start applying these ideas more broadly. For a deeper dive into advanced techniques, exploring how to leverage AI in content creation can open up some really exciting possibilities. By getting comfortable with these tools, you can produce incredible, on-brand images that not only grab attention but also drive real sales.
Getting Your Images Ready for E-Commerce
You’ve done the hard work of shooting and editing, but this last step is where it all comes together. A beautifully retouched photo is useless if it slows your website to a crawl or gets rejected by a marketplace for not meeting their specific rules. Think of this stage as the final polish before your product goes live.
It's all about striking the right balance. You need an image that looks crisp and professional, but the file size has to be small enough to load quickly. This isn't just a technical detail—it directly impacts your sales. A mere one-second delay in page load time can cause a 7% drop in conversions. Ouch.
Choosing the Right File Format
First things first, you need to pick the right file format. The decision really boils down to one simple question: does your image have a transparent background?
- JPEG (or JPG): This should be your default choice for most product photos. JPEGs are fantastic at compressing images with lots of colors and details (like your product) into a manageable file size. For fast-loading web pages, they are the industry standard.
- PNG: The only time you should reach for a PNG is when you need transparency. If you plan to place your product on a custom-colored background or within a graphic on your website, a PNG file will preserve that see-through background. Just be aware that the file size will be significantly larger.
- WebP: This is a more modern format from Google that does an excellent job with compression for both standard and transparent images. While most modern browsers support it, some older systems or e-commerce platforms might not play nicely. Always double-check your marketplace's guidelines before committing to WebP.
For the vast majority of sellers, sticking with high-quality JPEGs for your main product shots is the smartest, safest bet.
Sizing and Resolution for Online Marketplaces
Every platform, from Amazon to Shopify, has its own set of image requirements, but there are some solid best practices that will serve you well everywhere. Most major marketplaces recommend your images be at least 2000 pixels on the longest side. This isn't an arbitrary number; it's what allows for a high-quality zoom function so shoppers can get a closer look at the fabric and details.
What about resolution? You’ll often hear the term PPI (Pixels Per Inch). For anything displayed on a screen, 72 PPI has been the gold standard for decades. Bumping it higher won't make the image look any better online—it will just bloat the file size unnecessarily.
Key Takeaway: For a winning combination, export your images as JPEGs at 72 PPI, with the longest edge measuring at least 2000 pixels. Aim to compress the file to be under 1MB to keep your site fast and your customers happy.
Smart File Naming Is Good SEO
Don't skip this last, simple step: naming your files. A generic name like IMG_8475.jpg offers zero value. A descriptive file name, on the other hand, can give your search engine optimization (SEO) a nice little nudge.
Before you upload anything, rename your files to include your brand, the product name, and a few relevant keywords. Something like your-brand-blue-wool-sweater-front.jpg is far more effective. It tells search engines exactly what the image is about, helping you show up in more searches. For businesses handling tons of images, outsourcing this and other technical tasks to professional photo editing services for ecommerce can be a huge time-saver.
Ready to turn your product photos from simple snapshots into assets that actually drive sales? ProdShot leverages AI to instantly remove backgrounds, fix lighting, and produce studio-quality images in seconds. Give it a try for free and see just how easy it is to build a professional, on-brand product gallery that sells. Get started today at https://prodshot.net.