
How to Blur Background for Picture-Perfect Photos
Have you ever scrolled through a feed and stopped on a photo that just pops? Chances are, the secret sauce was a beautifully blurred background that made the main subject leap off the screen. Learning how to create that effect is a game-changer, turning everyday snapshots into something that looks genuinely professional.
It's all about creating depth and guiding the eye, a fundamental skill that can elevate your photography in a big way.
Why a Blurred Background Makes Such a Difference
That soft, out-of-focus background isn't just for show—it's a powerful compositional technique. In the photography world, we call this effect bokeh. It works by creating a shallow depth of field, which essentially separates your subject from everything else happening in the frame.
Think of it as putting a spotlight on what matters most. Whether you're shooting a product for your online store or taking a portrait, this technique instantly declutters the scene and directs the viewer’s attention right where you want it. The result is a clean, polished image that feels intentional and high-end.
The Psychology of a Soft-Focus Background
There's a reason blurred backgrounds are so pleasing to the eye. They subtly mimic the way our own vision works. When we focus on an object up close, our peripheral vision naturally softens. This makes photos with a shallow depth of field feel more intuitive and immersive.
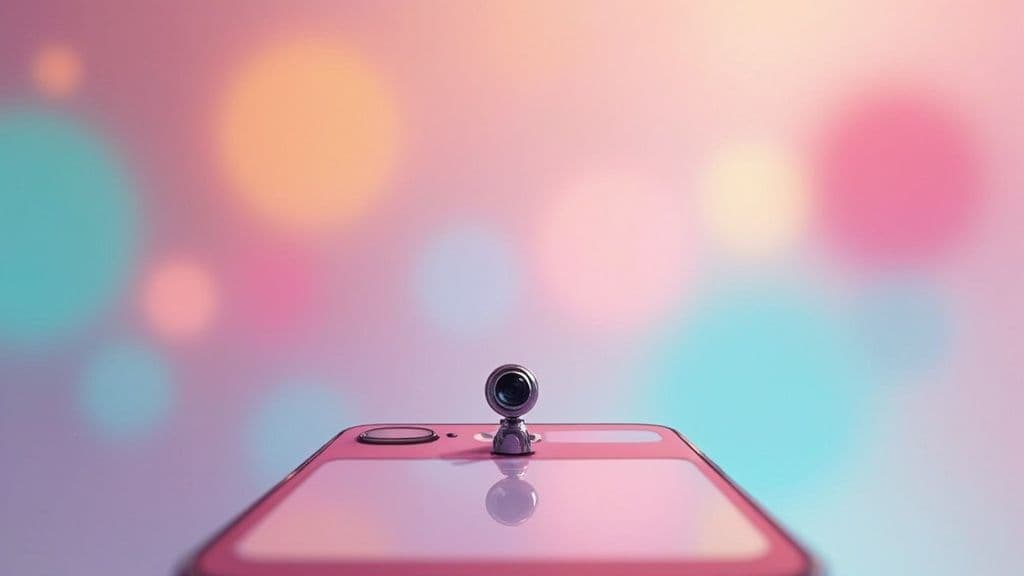
This visual cue sends a clear message to our brains: "Pay attention to this." It's an incredibly effective tool in marketing and branding because it immediately highlights the hero of the shot. The demand for this look is so high that it’s now a default feature on almost every new smartphone.
Market research reveals that over 75% of smartphone users regularly use portrait mode, which digitally blurs the background. This single feature became a huge selling point, influencing the design of more than 1.5 billion smartphone cameras sold worldwide.
A Must-Have Skill in Today's Visual World
The good news? You no longer need a high-end DSLR and expensive lenses to achieve this effect. From the portrait mode on your phone to sophisticated desktop software and one-click AI editors, creating a beautiful blur is easier than ever.
The core principles, however, haven't changed. To truly get stunning results, you need to understand the fundamentals of composition. For those interested in expanding their skills, exploring resources like The Art and Techniques of Drone Photography can offer fresh perspectives on composition and visual storytelling.
Getting That Perfect Background Blur with Just Your Smartphone
You probably have everything you need for that professional, subject-popping blur right in your pocket. Smartphone cameras have come a long way from being simple point-and-shoots; they are now sophisticated imaging tools, driven by powerful computational photography. Long gone are the days when you needed a heavy DSLR to get a polished shot. Today, a few simple taps can do the trick.
Most modern smartphones, whether you're on an iPhone or an Android, come equipped with a dedicated Portrait Mode. This clever feature uses software to digitally separate your product from everything behind it, then applies an artificial blur. It's an incredibly easy way to learn how to blur a background and make your photos look instantly more high-end.
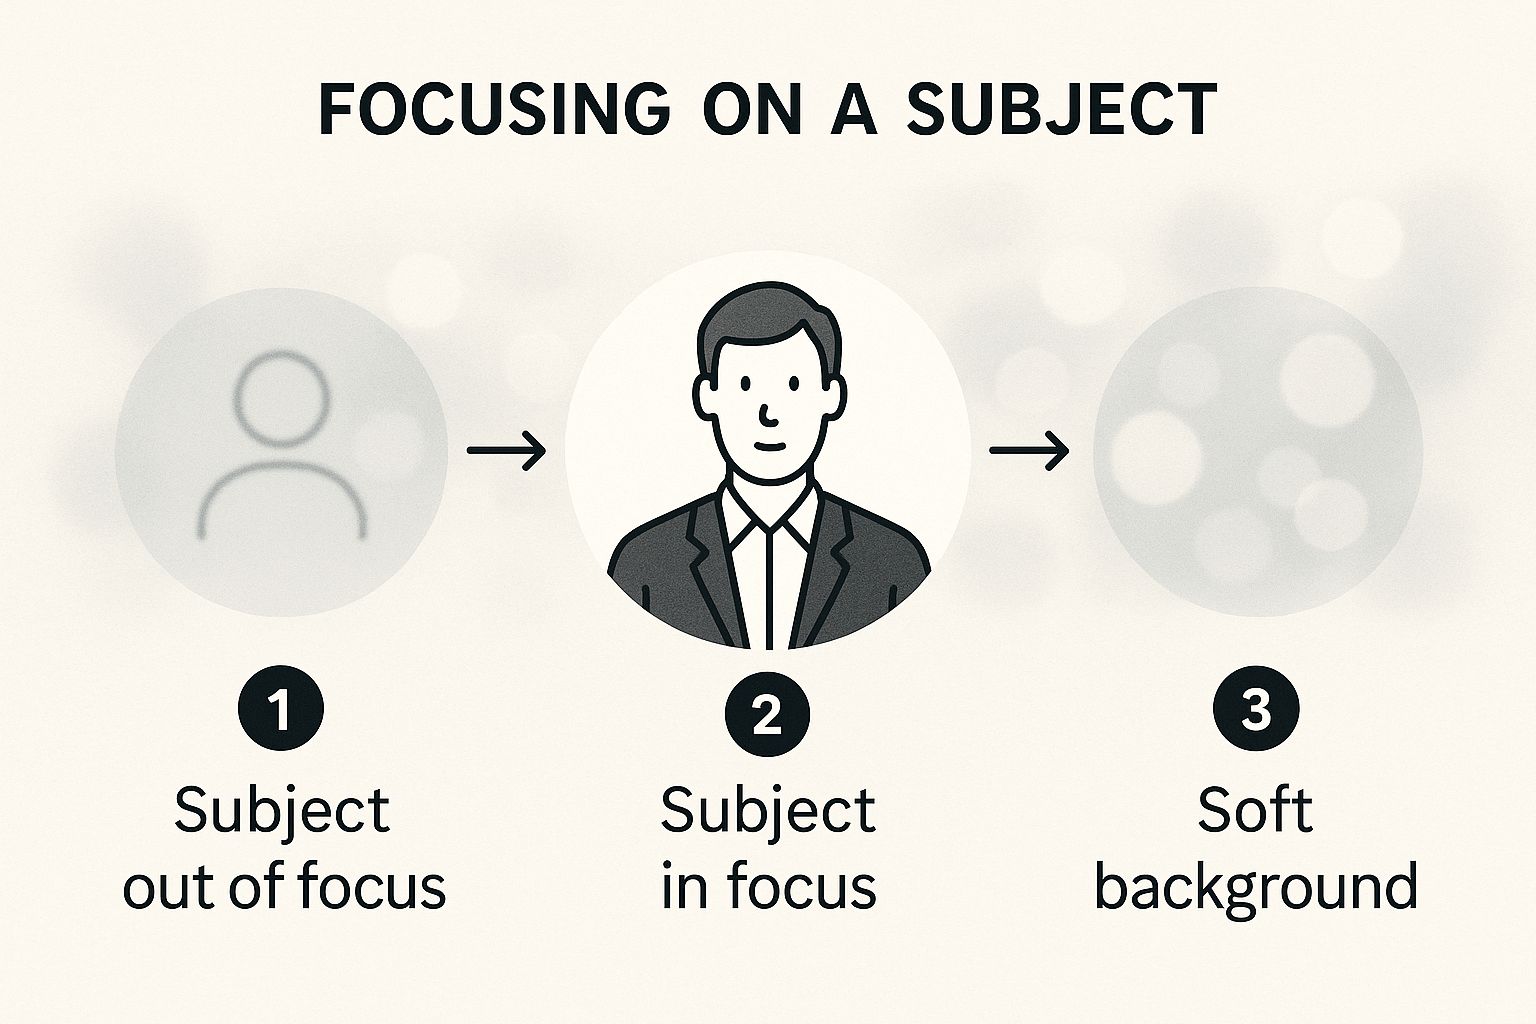
As this illustrates, the phone’s software builds a "depth map" to understand what’s in the foreground. It keeps that part of the image tack-sharp while beautifully softening the background details.
Fine-Tuning Your Phone’s Blur Settings
Just switching on Portrait Mode is a good first step, but the real control comes from adjusting the intensity of the blur. Almost every phone lets you go back into a Portrait Mode photo and tweak the effect, giving you a much more customized and natural-looking result.
If you’re using an iPhone, just open the photo, tap "Edit," and find the f-stop slider. It usually ranges from something like f/1.4 to f/16. A lower number (like f/2.8) gives you a much blurrier, creamier background. A higher number (like f/8.0) keeps more of the background in focus. Android phones have a similar feature, often labeled "Adjust blur" or "Portrait effect" in the photo editing tools.
My Two Cents: Avoid cranking the blur all the way up. I've found that a subtle blur almost always looks more professional than an aggressive one that completely melts the background into an unrecognizable mess. Start somewhere in the middle and adjust until it just feels right.
Tips for Getting Better Smartphone Bokeh
While your phone’s software is doing most of the work, you can give it a big helping hand to get cleaner, more convincing results. The final quality of that blur really hinges on the information your camera can gather in the first place.
Here are a few things I always do to get it right:
- Create Some Space: Physically move your product away from the background. The more distance you put between your subject and whatever is behind it, the more natural and noticeable the blur will be.
- Light It Right: Good, even lighting is your best friend. It helps the AI accurately trace the edges of your product. Shooting in dim light can cause weird, messy edges or that classic "halo" artifact around your subject.
- Mind the Edges: Tricky details like hair, fur, or see-through objects can really confuse the software. Keep this in mind when you're setting up your shot and try to frame it to minimize these problem areas.
The technology is only getting better. The emergence of new hardware, like smartphones with 200MP AI cameras, is making it easier for phones to handle these complex details. For anyone selling online, knowing how to use these phone features is a huge advantage. That said, if you need flawlessly consistent product images for your store, a dedicated Shopify photo editor can be a real time-saver and give your entire product catalog a polished, uniform look.
Gaining Full Control with Desktop Software
When you need absolute, pixel-perfect precision, it's time to move to the desktop. While smartphone apps are great for quick edits, dedicated software like Adobe Photoshop or the excellent free alternative, GIMP, gives you the kind of granular control that separates good images from truly professional ones.
This is where you stop just applying an effect and start crafting it. Instead of a one-size-fits-all blur, you can create a realistic depth of field. Think about how a real camera works: elements just behind your product are slightly soft, while the distant background is much blurrier. That’s the level of nuance you can achieve with desktop tools.
This whole concept of digitally blurring backgrounds has fascinating roots. It all started with the invention of the charge-coupled device (CCD) back in 1969, which shifted image manipulation from the world of optics to the realm of computation. That single innovation laid the groundwork for the powerful digital tools we rely on today. If you're curious, you can dive deeper into the evolution of these digital video technologies to see just how far we've come.
Mastering Subject Selection
Let's be honest: the single biggest giveaway of a cheap edit is a sloppy selection. That weird, fuzzy "halo" around a product screams amateur. This is where desktop software truly shines, because a perfect blur starts with a perfect cutout.
Instead of letting an algorithm guess where your product ends and the background begins, you take charge. For products with clean, hard edges—like a smartphone, a bottle, or a book—the Pen Tool is your absolute best friend. It lets you draw a mathematically precise path around your object, guaranteeing an incredibly crisp edge that automated tools can rarely match.
For trickier subjects with soft or complex edges, you'll need a different approach. Here are a few tools I regularly use in my own workflow:
- Object Selection Tool: A fantastic starting point. It uses AI to get you about 80% of the way there in a single click.
- Quick Selection Tool: This lets you "paint" your selection, which is often faster for less-defined shapes.
- Select and Mask Workspace: This is the big one. It's a dedicated environment for refining tough selections, like the soft edges of a sweater or the intricate details of jewelry.
My Personal Tip: Always, always zoom in to at least 200% when you’re refining a selection mask. An edge that looks perfectly fine at a glance will often show small imperfections up close. Spending an extra few minutes here makes all the difference.
Applying the Perfect Blur
Once you have your product cleanly isolated on its own layer, the real fun starts. You're no longer stuck with a single, generic blur. You have an entire arsenal of creative blur effects at your disposal.
The most straightforward method is to apply a Gaussian Blur to your background layer. It creates a simple, uniform softness that can work well in many situations. But if you're aiming for that authentic, in-camera look, you really want to explore Photoshop's Blur Gallery.
Here are a few of my favorites and how I use them:
| Blur Type | Best Use Case | Why It Works |
| Field Blur | Creating realistic depth | Lets you place multiple pins with different blur strengths. I’ll put a pin with a slight blur right behind the product and another with a heavy blur on the distant background. |
| Iris Blur | Drawing the eye | This creates a sharp focal point that gradually blurs outward, perfectly mimicking how a lens would draw attention to one specific area. |
| Tilt-Shift Blur | Creating a "miniature" look | Keeps a horizontal or vertical band in sharp focus while blurring everything else. It’s fantastic for top-down shots of product layouts. |
By pairing a meticulous selection with these sophisticated blur filters, you gain ultimate control. The end result is a polished, striking, and completely believable product photo that will make your listings stand out.
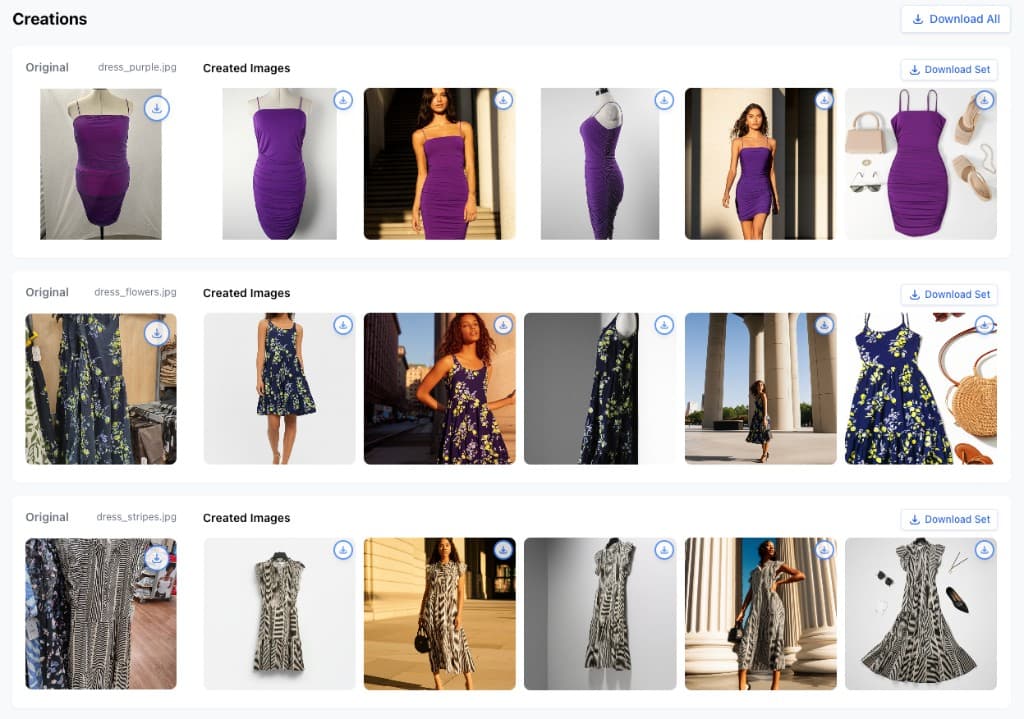
Using AI Tools for a One-Click Background Blur
Welcome to what feels like the future of photo editing. If you've ever wrestled with complex software just to blur a background, you know the pain. Thankfully, we're now in an era where AI-powered tools can do the heavy lifting for you, often with just a single click.
These aren't your old, clunky editing plugins. Modern AI editors use incredibly smart algorithms to instantly identify your product. They can distinguish it from the background with a level of precision that's honestly shocking, then apply a clean, natural-looking blur. This isn't just about saving time; it's about getting professional results without the steep learning curve.

Why AI Is a Powerful Ally for Product Photos
Picture this: you're an e-commerce owner with a fresh batch of 100 new products to get online. The old way meant spending days—or even weeks—in Photoshop, painstakingly editing each and every photo. With AI, you can knock out that entire workflow in minutes.
This kind of efficiency is a game-changer for keeping your product catalog looking sharp and consistent. The speed and simplicity free you up to focus on running your business, confident that your visuals are top-notch. For a deeper dive into how platforms are using AI for content and image generation, it's worth checking out resources that specialize in this technology.
What's really impressive is how well these AI tools handle the tricky stuff. They nail the fine details that would give even an experienced photo editor a headache.
- Complex Edges: AI is fantastic at tracing around difficult elements. Think wisps of hair, delicate jewelry chains, or the fuzzy texture of a knit scarf.
- Speed and Volume: You can batch-process dozens of images in the time it used to take to manually mask just one. This is a massive win for anyone with a large inventory.
- Consistency: The AI applies the same style across all your photos, giving your brand a cohesive and polished look on your website and social media feeds.
This automation is incredibly powerful. For instance, a platform like ProdShot can transform a basic smartphone photo into a studio-quality image automatically. If you need to create visuals at scale, using an AI product photo generator can completely streamline your creative process.
Choosing the Right AI Blur Tool
Here’s the thing: not all AI editors are built the same. As you start exploring, you'll see that different tools have different strengths. Some are designed for pure speed and simplicity, while others give you more creative say over the final image.
One tool might excel at creating a super-realistic bokeh effect, complete with those soft, circular highlights you see from high-end camera lenses. Another might offer more artistic options like motion or radial blurs, which are perfect for creating dynamic, eye-catching product shots.
Key Takeaway: The "best" tool really comes down to what you need. If you're churning out thousands of e-commerce photos, look for an AI known for its batch processing and accuracy. But if you’re a content creator aiming for a specific artistic vibe, you’ll want a tool with more filters and adjustment sliders.
By knowing what to look for, you can find the perfect AI assistant to help you create stunning, professional-looking photos with surprisingly little effort. It's a smart way to elevate your photography without getting bogged down by technical details.
Avoiding Common Background Blur Mistakes
Adding a background blur can make your product photos pop, but it's surprisingly easy to get wrong. There's a subtle art to it, and a few common slip-ups can make an otherwise great shot look clumsy and amateurish. Learning to spot these tells is the key to creating a blur that looks intentional and professional, not just edited.
The most obvious mistake I see is the dreaded "halo" effect. This is that faint, glowing outline that appears around your product when the blur spills over its edges. It’s a dead giveaway that the background was digitally altered and instantly shatters the illusion of a high-quality photo.
Another classic pitfall is simply going overboard with the blur. It can be tempting to crank that slider all the way up, but turning your background into a completely uniform, soupy mess often looks unnatural. A great blur softens the background, it doesn't obliterate it. You want to reduce distraction, not remove all context.
Refining Your Edges and Blur Intensity
Getting rid of halos comes down to one thing: a clean, precise selection of your subject. If you're using desktop software like Photoshop, you have to zoom in—and I mean really zoom in. Meticulously trace the edges of your product. Pay extra attention to tricky spots with complex shapes or soft textures. Tools like Photoshop's "Select and Mask" workspace are your best friend here, as they're built for handling these soft transitions.
When it comes to blur intensity, the fix is all about restraint. A little goes a long way. The goal is to gently guide the viewer's eye to your product, making it the undeniable star of the show. A good starting point is to apply just enough blur to soften the background details without making them unrecognizable.
The most believable digital blur almost always imitates how a real camera lens works. This means the blur isn't a flat, uniform effect. Instead, it’s a gradient—objects closer to the lens are sharper than those deep in the background. Nailing this adds a layer of realism that most one-click filters just can't match.
Creating Realistic Depth and Consistency
A flat blur that's the same from front to back is another tell-tale sign of a quick edit. Real-world depth of field doesn't work that way; it creates a gradual transition from sharp to soft.
Here’s how to build a more convincing sense of depth:
- Layer your blur: Many advanced tools let you create a gradient or use different blur levels on separate layers. You can make the area right behind your product just a little soft and progressively increase the blur for objects further away. This one technique alone adds incredible realism.
- Hunt for artifacts: AI tools are great, but they sometimes miss small gaps—like the space inside a mug handle or between a shoe's laces. These spots can get left behind, remaining perfectly sharp against a blurry background. Always do a final once-over to catch and fix these inconsistencies.
Mastering these details takes some practice, but it's what separates good product photography from truly great work. If you're running an e-commerce store and need consistently perfect images without spending hours on manual edits, professional photo editing services for ecommerce can be a game-changer, saving you time while making every product look incredible.
A Few Common Questions About Blurring Backgrounds
As you start experimenting with these different ways to blur your photo backgrounds, you'll probably run into a few questions. It's totally normal. Getting that perfect, professional look often comes down to understanding the little details. Let's clear up some of the most common points of confusion.
Think of this as a quick reference to help you pick the right approach for your project and avoid some of those rookie mistakes.
What's the Real Difference Between Optical and Software Blur?
This is a great question. Optical blur, which photographers lovingly call bokeh, is the genuine article. It’s created right in the camera when you shoot with a lens that has a wide aperture (like f/1.8). This physically creates a shallow depth of field, making the background melt away into that beautiful, creamy softness with those classic circular light orbs. It's the gold standard.
Software blur, on the other hand, is a post-production trick. An algorithm looks at your photo, tries its best to figure out what your main subject is, and then digitally blurs everything behind it. Today’s AI is shockingly good at this, but it can still get tripped up by complex edges—think wispy hair, fuzzy sweaters, or anything see-through. Sometimes, this results in a slightly artificial "cutout" look that you wouldn't get with a real lens.
Can You Blur the Background in a Video, Too?
Absolutely, and it's easier now than ever. Many newer smartphones, like iPhones with their Cinematic Mode, can do this on the fly while you're recording. It’s a fantastic feature for creating more professional-looking video without much effort.
But if you need serious control and Hollywood-level quality, you’ll want to turn to professional video editing software. Tools like these are built for the job:
They use sophisticated tracking and masking techniques (sometimes powered by AI) to keep the blur locked onto the background as your subject moves. It's definitely more work than just tapping a button on your phone, but the polished, cinematic result is often worth it.
Key Takeaway: The secret to a natural-looking blur is all about subtlety and creating a sense of depth. A realistic blur is rarely uniform; objects closer to your subject should be less blurry than those far in the distance.
How Can I Make My Blur Look Natural, Not Fake?
Making a software-based blur look believable really comes down to two things: a delicate touch and clean edges. It’s easy to go overboard, but restraint is your best friend here.
First, resist the urge to crank the blur slider to the max. The goal is to soften the background and reduce distractions, not completely erase it into a monotone mush. You want people to feel the depth, and that means leaving some subtle shapes and textures back there.
Second, a truly realistic blur has a gradual transition. This is where high-end desktop tools like Photoshop's Field Blur really shine. They let you create a "depth map" by placing different blur points. You can set a light blur just behind your product and a heavier blur way in the back, perfectly mimicking how a real camera lens sees the world. Most importantly, always zoom in and check the edges of your subject. A clean, well-defined edge is what sells the whole effect.
Ready to create scroll-stopping product photos without the hassle of manual editing? ProdShot uses AI to instantly remove backgrounds, add perfect lighting, and create conversion-optimized images in seconds. Try it free and see how easy it is to elevate your brand. Start your free trial at ProdShot.net.