
eBay Photo Dimensions A Seller's Essential Guide
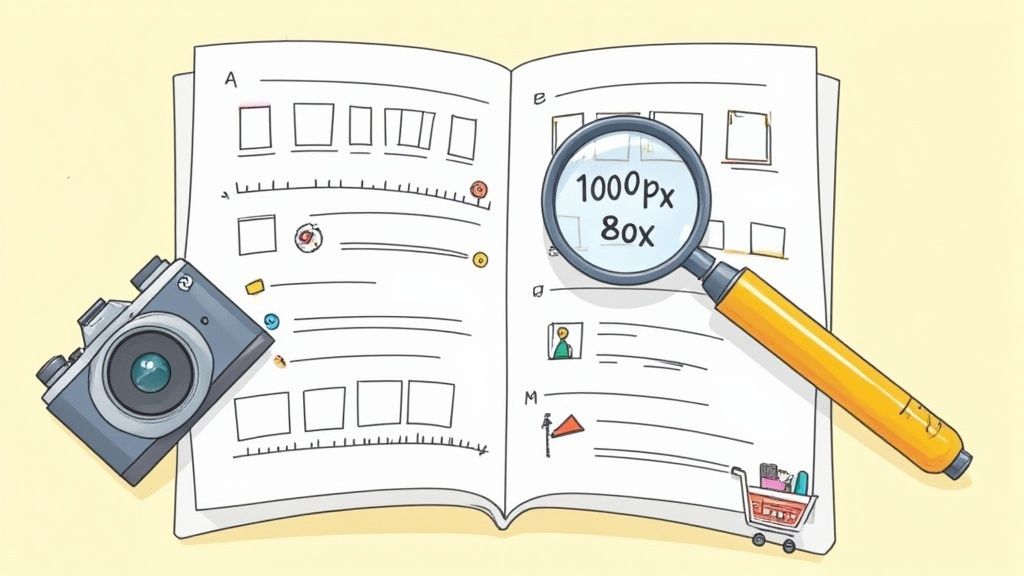
When it comes to eBay photo dimensions, the magic number to remember is 1600 pixels. You'll want the longest side of your photo (either the height or the width) to hit at least this mark.
Why 1600? This is the sweet spot that unlocks eBay’s zoom feature, letting buyers get a really good, up-close look at your item. While eBay technically allows a minimum of 500 pixels, anything that small will look blurry and unprofessional when a shopper tries to zoom in. Honestly, think of 1600 pixels as your baseline for creating a listing that truly sells.
Your Quick Guide to eBay Photo Requirements
Getting your photos right on eBay isn't just about ticking a box; it's about making a sale. Great images build instant trust, show off your product's condition, and answer questions before a buyer even has to ask. Nail the specs from the get-go, and you’ll create a workflow that’s both professional and efficient.
eBay Image Requirements At a Glance
To make this super easy, here’s a quick-reference table with the technical specs straight from eBay. These guidelines are in place to ensure your products look sharp and load quickly, whether someone is browsing on their phone or a giant desktop monitor.
| Specification | Requirement | Recommendation |
| Minimum Dimensions | 500 pixels on the longest side | N/A - Always aim higher |
| Recommended Dimensions | N/A | 1600 pixels on the longest side |
| Maximum File Size | 12 MB per photo | Keep under 7 MB for faster loads |
| Supported File Types | JPEG, PNG, GIF, TIFF, BMP | Use JPEG for the best quality-to-size ratio |
| Number of Free Photos | Up to 24 photos per listing | Use as many as needed to show all angles |
Think of this table as your pre-upload checklist. Taking a moment to check these details can save you the headache of a rejected listing or, worse, a listing that just looks unprofessional and drives buyers away. Following these guidelines is one of the most important first steps for any eBay seller's product photos.
How Better Photos Actually Drive Sales on eBay
Let's get one thing straight: your product photos aren't just there to meet eBay's rules. They're your most powerful sales tool. When you get them right, they do more than just show what you're selling—they build trust, increase your item's perceived value, and can make even a simple product look like a premium must-have.
Think about it from a buyer's perspective. When they can zoom in and see every angle and detail clearly, their confidence skyrockets. That confidence is what turns a casual browser into a committed buyer, directly boosting your conversion rates. This isn't just a hunch; it's a proven fact backed by data.
Listings that feature photos with at least 1600 pixels on the longest side experience an average sales lift of about 7%. It’s also why eBay’s own photo standards—which ban distracting borders and text—are so strict. They know that a clean, professional look creates a more trustworthy marketplace where people feel comfortable spending money. For a deeper dive into these guidelines, you can check out some helpful in-depth eBay photo guides.
Get More Eyes on Your Listings
Good photos don't just win over shoppers; they also get you on the good side of Cassini, eBay's search algorithm. The system is designed to promote listings that provide the best possible customer experience, and a full gallery of high-resolution images is a huge green flag.
When you upload a dozen crystal-clear photos, you're sending a strong signal to eBay that your listing is high-quality and thorough. Cassini rewards this effort, which can lead to better placement in search results and put your products in front of far more potential buyers.
Great images are truly foundational to a successful online store. But they're just one piece of the puzzle. Integrating them with broader strategies to increase ecommerce sales is how you can really start to see significant growth.
Mastering Aspect Ratios for Consistent Listings
While pixel dimensions get a lot of attention, the aspect ratio is just as important. It’s what defines the shape of your image, and it has a massive impact on how your products look across eBay. Although the platform is flexible, the unspoken rule among serious sellers is to use a square 1:1 aspect ratio. It’s the key to a professional, consistent look.
Have you ever uploaded a rectangular photo—say, a tall 2:3 or a wide 4:3—only to see it awkwardly cropped in the search results? That's eBay's system trying to fit your picture into a square thumbnail. Unfortunately, this automatic crop can slice off crucial product details, making your listing look amateurish and potentially confusing buyers.
Why a 1:1 Aspect Ratio Is Best
Sticking to a square format puts you in control. It eliminates those weird, automated crops and keeps your product perfectly centered and fully visible. With a 1:1 aspect ratio, you can be confident that what you upload is exactly what shoppers will see, whether they're scrolling through search results or viewing on their phone.
Imagine you’re selling a designer dress. If your main photo is a tall rectangle, the thumbnail might chop off the hemline or the neckline. This forces a potential buyer to click through just to understand what the item actually is, which is an extra step you don't want them to have to take.
The fix is simple: crop your photos to a perfect 1:1 square before you upload them. Taking this one proactive step gives you complete command over your product's presentation. Your main photo will look perfectly composed everywhere on the eBay platform, from the first glance in search to the final product page.
When you pair this consistent aspect ratio with the right eBay photo dimensions, you instantly elevate the professionalism of your entire store.
Practical Techniques for Optimizing Your Photos
Getting your eBay photo dimensions right is the first step, but it's really just the price of admission. If you want your listings to truly pop and grab a buyer's attention, you need to go a bit further with a few basic product photography techniques. The idea is to create images that don't just meet the rules but actually drive sales.
The cornerstone of any great product photo is a clean, uncluttered background. A simple white or light gray backdrop makes your product the hero of the image, eliminating any distractions from the background. This one change can immediately make your listing look far more professional.
Next up is lighting. You don't need a professional studio for this; honestly, soft, diffused light from a nearby window is often perfect. Just make sure you position your item to avoid casting harsh shadows that hide important details. Your goal is even lighting that shows off the product's true color and texture.
Capture Every Important Detail
Shoppers on eBay want to inspect an item virtually just like they would in a store. Your photo gallery needs to tell the whole story of the product, leaving no questions unanswered.
Here's how to make that happen:
- Show Multiple Angles: Don't just shoot the front. Capture the back, sides, top, and bottom. The more visual information you provide, the more confident a buyer becomes.
- Demonstrate Scale: For smaller items, placing a familiar object like a coin next to it gives an instant sense of its actual size. This simple trick helps manage buyer expectations and can cut down on returns.
- Be Honest About Flaws: If there's a scratch, a scuff, or any other imperfection, take a clear, close-up photo of it. Full transparency builds trust and almost always results in better feedback.
Think of it this way: by showing every facet of your product, both the good and the bad, you're answering questions before they're even asked. This not only builds your credibility but also protects you as a seller by creating an accurate visual record of the item's condition.
Once you’ve taken your photos, the last step is a bit of digital polishing. You can use free online tools to resize your images to the recommended 1600 pixels and crop them to that perfect 1:1 aspect ratio. While doing it yourself works well, some sellers find that outsourcing this final touch gives their store a consistently polished look. For that, professional photo editing services for ecommerce can handle the technical work, ensuring every single image is perfectly optimized and ready to sell.
Avoiding Common eBay Photo Policy Mistakes
Trying to follow all of eBay’s photo policies can feel like a maze, but once you know the common pitfalls, it’s much easier to stay on the right track. Getting it wrong isn't just a minor issue; policy violations can get your listings hidden from search results or removed entirely. It's a risk no serious seller can afford.
Many sellers trip up by adding things to their photos—like text or borders—thinking it will help their listing stand out. In reality, eBay’s rules are in place to ensure a clean, uniform, and trustworthy shopping experience for everyone. Anything that clutters the image or distracts from the product itself is a step in the wrong direction.
The most common mistakes usually come from good intentions but ultimately backfire. This infographic highlights the top three issues that frequently hurt a listing's visibility and sales potential.
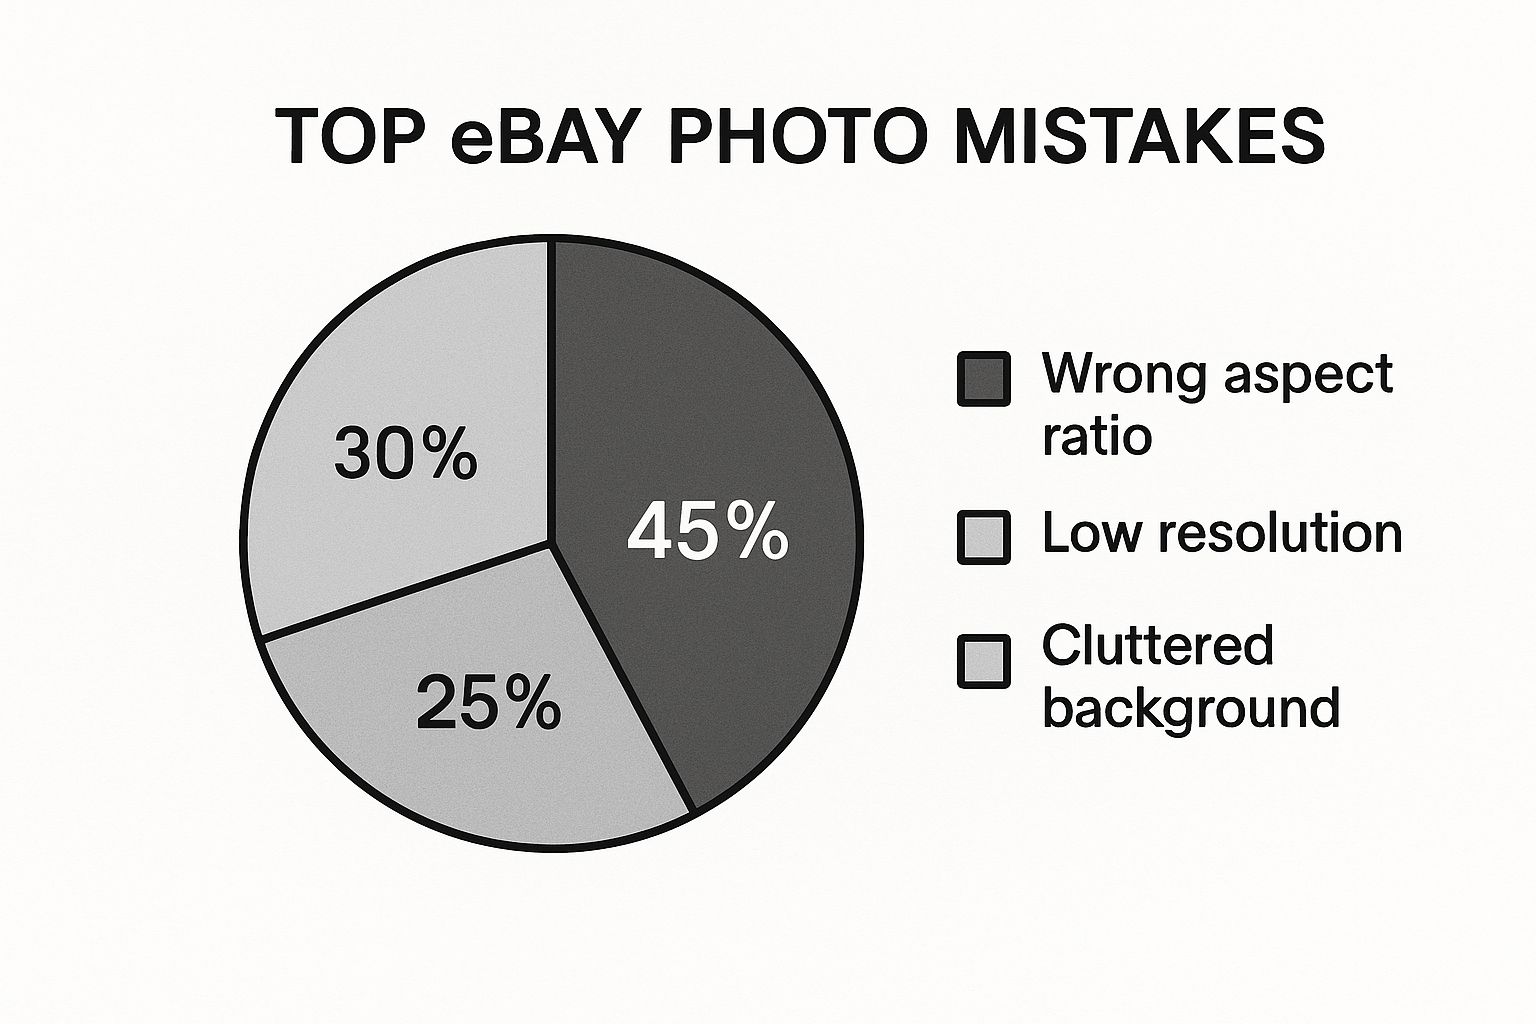
As the data shows, fundamental problems with ebay photo dimensions and basic image quality are the biggest culprits. Let's dig a little deeper into the most critical mistakes and, more importantly, how to fix them.
Prohibited Text, Borders, and Watermarks
One of the easiest rules to break is adding extra graphics directly onto your product photos. It's tempting to plaster "Free Shipping!" or drop your store logo onto an image, but eBay's policy is crystal clear: this is not allowed.
Here's the breakdown:
- The Mistake: Overlaying your photos with promotional text, company logos, or decorative borders that aren't a natural part of the item.
- Why It's a Problem: This creates a messy, unprofessional look that undermines buyer trust and directly violates eBay's picture policy. Listings with these elements can be taken down without warning.
- The Fix: Keep your images clean. The photo's job is to show the product clearly and accurately. Let your listing title, item specifics, and description handle the promotional details.
A quick note on watermarks: You can use a watermark to claim ownership, but it must be subtle. The rule is that it must be semi-transparent, cover no more than 5% of the total image area, and never hide any part of the product. Anything more obtrusive is a violation.
To help you stay compliant and effective, we've put together a quick-reference table that contrasts common errors with the best practices you should be following.
Common Mistakes vs Best Practices
| Common Mistake | Why It's a Problem | Best Practice Solution |
| Adding "Free Shipping" text to the main image. | Violates eBay's policy against promotional text and can cause your listing to be removed. | Mention shipping details in the dedicated shipping section of your listing. Use shipping promotions tools if available. |
| Placing a large, opaque logo in the corner. | Obscures the image, looks unprofessional, and violates the watermark policy. | If you must use a watermark, make it semi-transparent, small (under 5% of the image), and place it where it doesn't cover the product. |
| Putting a colorful, decorative border around the photo. | Creates visual clutter, distracts from the product, and is explicitly prohibited by eBay. | Use a clean, neutral background (preferably white or grey) and let the product be the sole focus of the image. |
| Using low-resolution images under 500 pixels. | Images appear blurry, especially on mobile, and buyers can't zoom in to see details. This kills buyer confidence. | Always upload high-resolution images, with at least 1600 pixels on the longest side for optimal zoom and clarity. |
By keeping your photos free of these distractions, you're not just following the rules—you're creating a better, more trustworthy experience for shoppers. That focus on quality and clarity is what ultimately helps turn a curious browser into a confident buyer.
eBay's Evolving Image Standards

To really get a handle on today's eBay photo dimensions, it’s useful to look back at how we got here. eBay's image rules weren't created in a vacuum; they’ve grown and changed right alongside technology and, more importantly, how people shop. What passed for a decent photo a decade ago now looks amateurish and can make buyers hesitate.
Think back to the early days of dial-up. Smaller, lower-quality images were a necessity. They loaded faster on slow connections and looked fine on the small, low-resolution monitors of the time. But as technology has leaped forward, so have customer expectations. Shoppers today are on crystal-clear retina displays and massive monitors, and they demand the ability to zoom in and see every last detail.
From Low-Res to High-Definition
This shift from grainy photos to crisp, high-definition visuals is mirrored in eBay's own policy changes. As recently as 2016, the standard advice was to cap images at around 1600 x 1200 pixels. This was seen as the sweet spot between decent detail and fast loading times—a crucial factor when a slow page could cost you a sale.
As internet speeds skyrocketed and screens improved, eBay started pushing for better quality. They began strongly recommending photos with at least 1600 pixels on the longest side. This allows for that all-important zoom feature without sacrificing clarity, while keeping file sizes from getting out of control. For a deeper dive into some of the older guidelines, you can check out this helpful article on eBay image formatting.
This evolution really drives home a fundamental truth of selling online: a great visual experience is non-negotiable. It’s how you build trust and convince someone to click "Buy It Now." Keeping up with these standards isn't just about following rules; it's about staying in the game.
The constant demand for better images means sellers have to continually invest in their presentation. If you're thinking about improving your photos, looking into the cost of professional product photography can give you a solid baseline for what it takes to stand out.
Frequently Asked Questions About eBay Photos
Even after you've got a handle on the official eBay photo dimensions, some tricky questions always seem to pop up. Let's tackle some of the most common ones I hear from sellers to clear up any lingering confusion and help you get your listings right.
Can I Use My Smartphone for eBay Photos?
You absolutely can. In fact, most modern smartphones have cameras that are more than powerful enough to take fantastic, sales-worthy photos for your eBay listings. It’s not about having the most expensive camera; it’s all about technique.
The secret is to focus on the fundamentals. Keep your phone steady (a simple tripod helps), find some good, bright lighting, and always tap your screen to lock the focus right on your product. Just double-check that your phone's camera settings are cranked up to the highest resolution, and you’ll easily hit that 1600-pixel recommendation.
How Many Photos Should I Actually Include?
eBay gives you up to 24 free photos for most categories, but that doesn't mean you have to use every single slot. The real goal is to be thorough and clear, not just to max out the count.
For most products, a sweet spot is somewhere between 8 and 12 high-quality photos. That’s usually enough to show the item from every important angle, zoom in on key features, and honestly point out any imperfections. It gives buyers all the information they need without overwhelming them.
What Happens If My Image Is Too Small?
Uploading an image smaller than eBay's 500-pixel minimum is a mistake you want to avoid. When an image is too small, it looks fuzzy and pixelated on most screens, which instantly hurts a buyer's confidence in your listing.
Worse yet, tiny photos kill the zoom function. Buyers count on being able to zoom in to inspect details, so if they can't, it’s a major roadblock. They’ll likely just click away to a competitor’s listing where they can see things clearly. Stick to 1600 pixels to give them the best possible view.
Does eBay Compress My Photos?
Yes, they do. When you upload your images, eBay runs them through a compression process. This is standard practice for almost all online marketplaces because it reduces the file size and helps pages load faster for shoppers.
This is exactly why starting with a high-resolution, 1600-pixel image is a non-negotiable best practice. When you give eBay's compression tool a big, crisp photo to start with, the final result on your listing will look infinitely better, sharper, and more professional.
Ready to create stunning, sales-driving product photos without the hassle of a photo studio? ProdShot uses AI to turn your simple smartphone pictures into professional, marketplace-ready images in seconds. Try ProdShot for free and see how easy it is to elevate your listings.